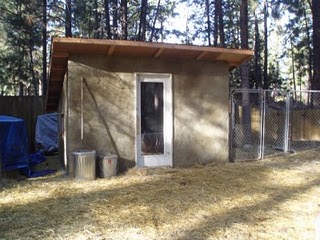
Well, we’re done. Coup is earthen plastered, tarps are off (still a few damp spots, but mostly dry), electricity is run and lights are on a timer to give them their extra “daylight” for laying (they need 14 hours of light to lay eggs).
AND I’m running again after 6 weeks off and about a month of 3-4 days per week of easy running. Nice to be back to semi-normal schedule and not thinking about the half-finished chicken coup every waking second…we beat the snow! Giddyup!
Here’s the recap in photos…
Rough Plaster Recipe for approx. 10-12 gallons of plaster: 12 handfuls of straw, 2 to 2 1/2 gallons of water, 1 cup of Borax (prevents mold). Start Mixer to mix it up. Then, add 7-8 shovel fulls of clay, 11-12 shovel fulls of sand. I would periodically stop the mixer and pull the clay off the back of the mixer wall and paddles and add another handful of straw in the back, start mixing again. Sometimes had to add little more water if the sand isn’t mixing in well (e.g. dry mix). I usually added an additional 5-8 handfuls of straw, one handful at a time, as I stopped the mixer to pull the clumps apart or off the back of the mixer. If the mix was not very sticky, I just added a half or quarter scoop of screened clay and a squirt of water from the hose and it usually made the batch way stickier. It was trial and error and eventually I ended up knowing how to compensate for certain conditions in the mix…more straw, more sand, more clay, more water, etc. depending on the condition. It’s like anything, you have to actually do it to learn it. I had read A LOT, but doing it makes you KNOW it.

Tea Time: Just because I’m covered from head to foot in clay plaster, doesn’t mean I can’t be civilized! Once I got the hang of the mixing, I started to brew tea and bring it out in a insulated carrier to enjoy a cup of tea while the mixer did the work.

Jennifer applying what I like to call the thin “push coat”over the mesh wire. She usually did the first thin coat and pushed and smeared the plaster into the screen. I came along behind and added thicker coat to even out the wall and fill all thin spots and seal edges really well. It was a good team effort!

Earthen plaster coat is on and drying. The tarps are to protect the wall while it cures from weather, wind and sun. It needs to cure slowly. A few times during the curing time I sprayed the walls down with a hose. It allows it not to crack as much and cure slowly. It’s a really rough coat and I probably didn’t wet it often enough, as I got some cracks. But, it is a chicken coup. My graphic design ego had trouble with this one. Perspective, Jeff, perspective.

Tarps off, finished coup. Just need to paint the door and roof eaves come spring. We also plastered the interior which looks cool with the built in laying boxes and exit door.


